First step is to add the DNS entries so that MX records and few other entries point to new email provider.
Go to domain registrar control panel and find out where the DNS / Name server is managed. It might be managed by domain registrar or Hosting sites. IF you see the Name servers as DNS1.bigrock.in or NS1.godaddy.com etc, then domain is managed by domain registering organization itself. Then you need to add the DNS entries in their control panel itself.
If Name servers looks like ns1.cp-13.webhostbox.net , then DNS is managed by hosting company. Most of the cases it can be managed using CPANEL .
Get the information for DNS entries from mail provider
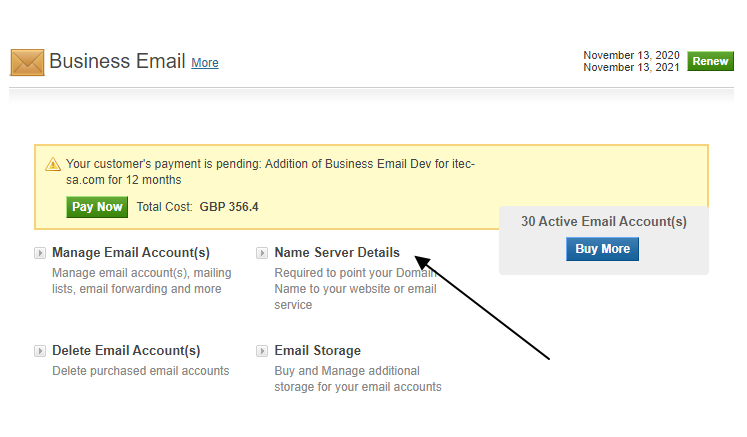
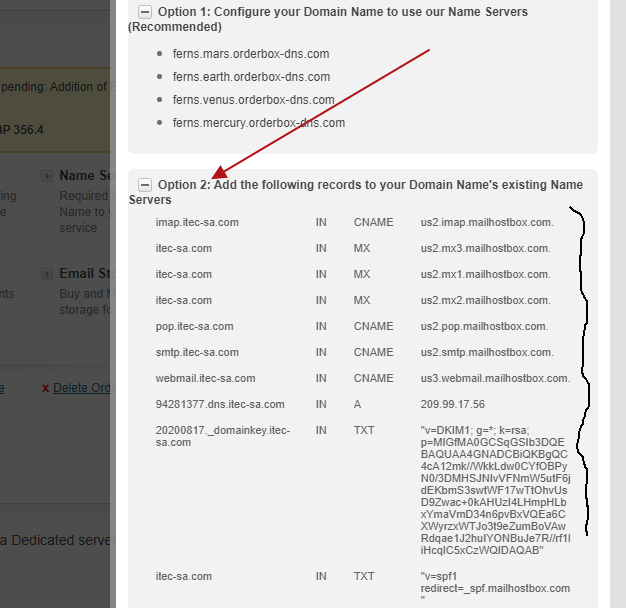
Click on Option 2 and get the information.
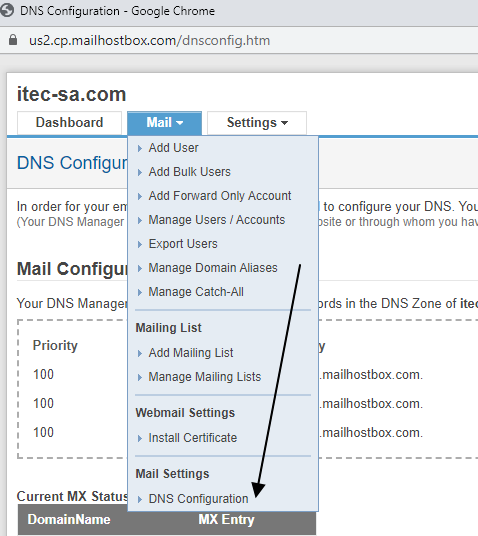
Once you add all entries , you can check the configuration by going here.
Click ” Manage Email Accounts”
- Now login to CPANEL , select DNS Zone Editor
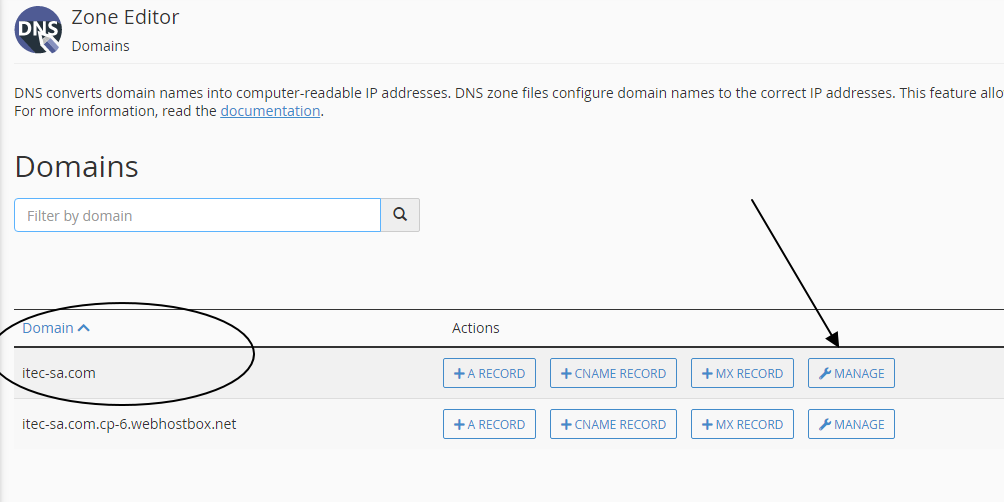
2. Add the entries we got from the email provider
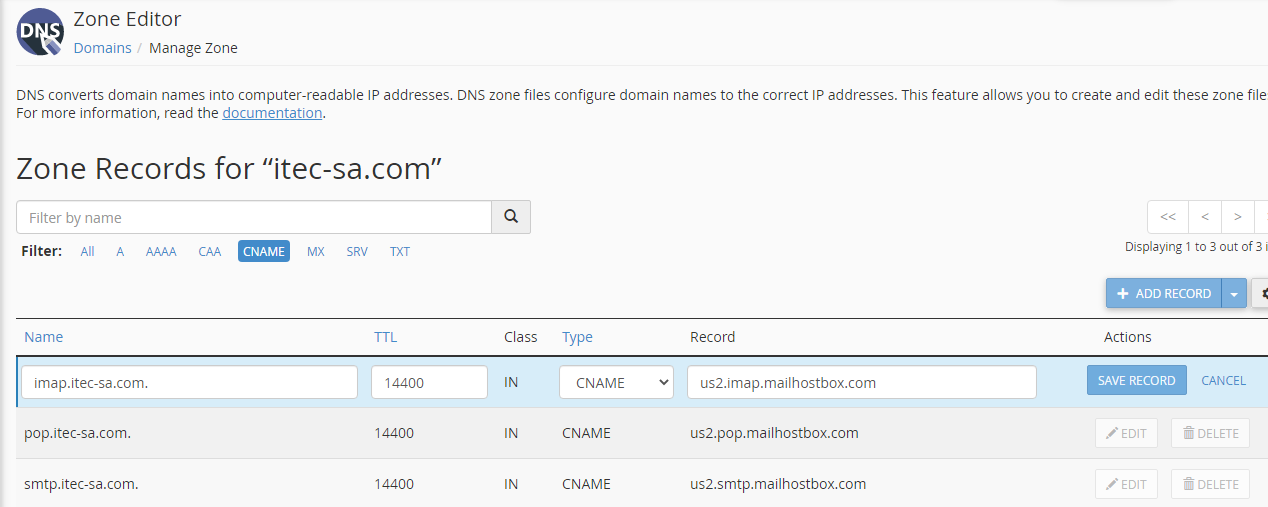
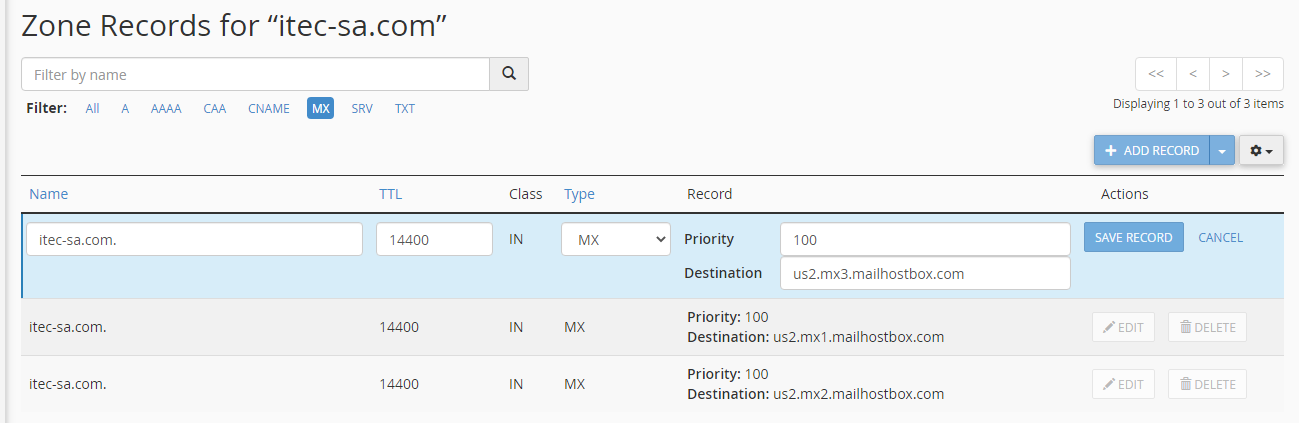
You need to add MX entries , TXT entries and A records provided by your email provider
Make sure you remove ” from the beginning and end of the entries.
CNAME
MX records
TXT records

Now you can start adding email accounts by going to Business email session on email provider panel.
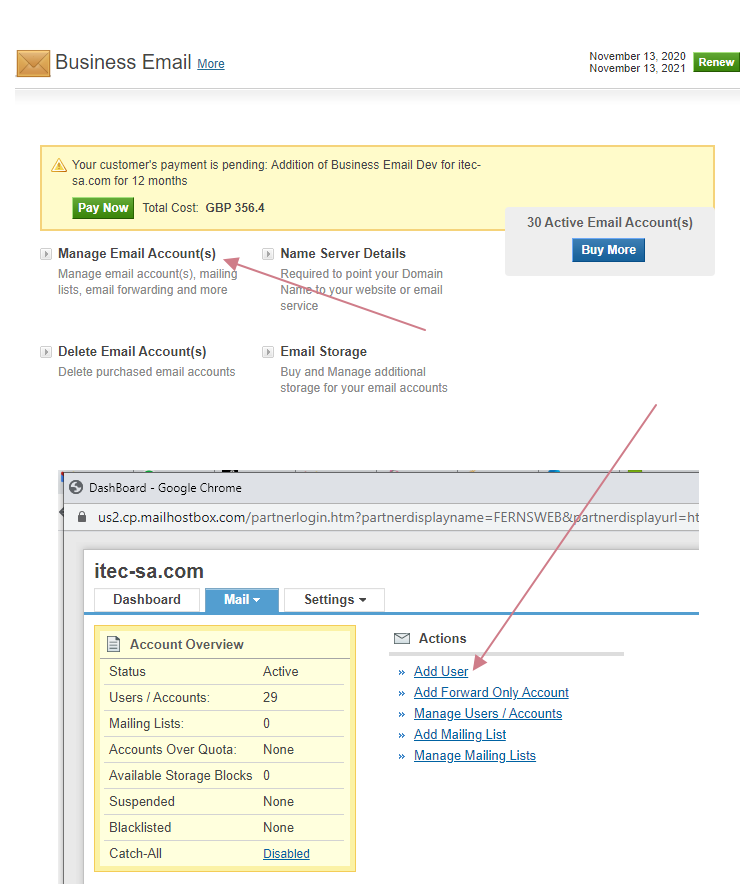
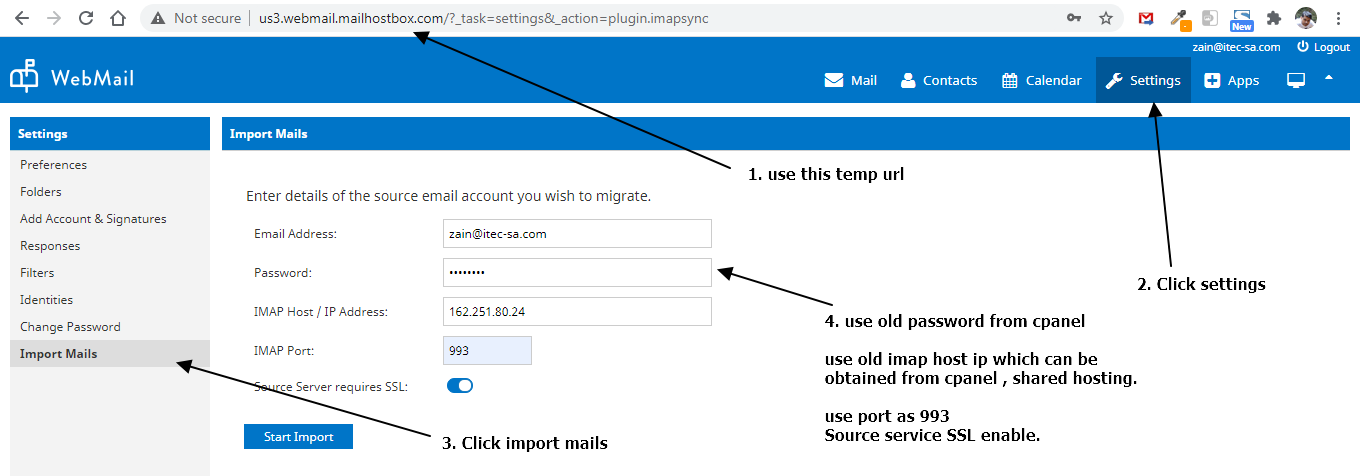
After adding users , We can migrate the old emails to new using the temporary URL given below (if you are using reseller club)
http://us3.webmail.mailhostbox.com/
Settings –> Import Mails
IMap host –> 162.251.80.24 (find out from cpanel , shared host ip)
port 993
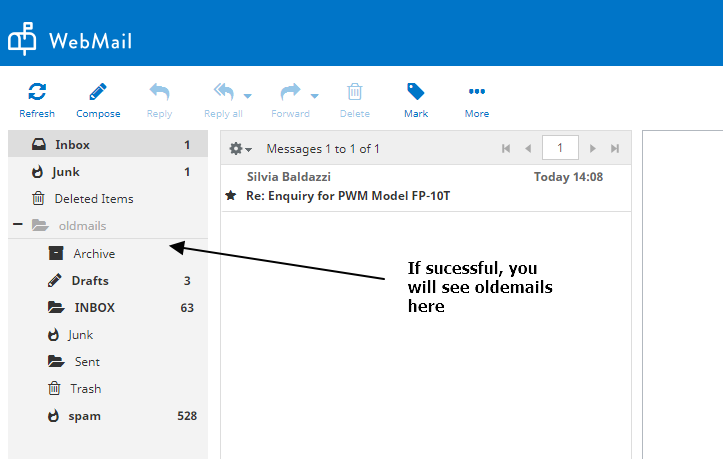
IF migration is successful , you can see the old emails as below.
Any arabic or other symbols might cause your migration to fail.